Introduction The main purpose of this program is to help in creating skins for WinAmp mp3 player. The program does not need an installation. Simply extract the archive WinAmpSC.zip and run SkinCreator.exe. After that you will be asked to specify WinAmp directory... do it :). Thats all, Skin Creator is ready to work.
Creating a skin step-by-step First of all let us select a picture from which the skin will be created. The bigger picture is, the better.
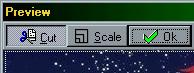
Then, you will be asked to select a part of the picture (the part you like best i guess - translator's remark ;) from which the skin will be created. Here you have two options, "Cut" and "Scale". The first one just cuts the part with necessary proportions, the second - automatically adjusts the scale of the selection.
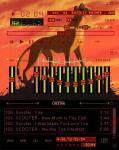
After that, we already can see what is happening with our skin, although in draft version, press "Preview" (that a colourful button in the bottom of the Main screen) to do it. The skin to be will appear in the left window. But buttons and appearance of the whole skin is tasteless, isn't it? Want to improve it? Try another style, or even create one! :) Styles are a composition of filters, which define the WinAmp's look. They are available in the "Main" bookmark, "Styles" group. More styles can be downloaded from here, or by pressing "Download More" button in program. After sketching the appearence, lets define the colours.
Found a great palette? Great! :) We are almost done! Now all that our skin needs - is something to underline the uniqueness of it :) - hmmm, the skin's name will do it... as well as the skin's author information. This can be done at "Misk" bookmark. Write your skin's name in "Skin Name" box, your name (or nick, which is much more fun - translator's remark ;) in "Skin Autor" box, yours e-mail and home page (if exists) in "E-mail" and "Web" respectively. Ok, one final step - just press "Create Skin". Your skin will be written in WinAmp's skin folder. Try it - run WinAmp, press "Ctrl+S" or select "Options -> Skin", find your creation and say "Hail Sarabi!" after all ;) - Ok, ok translator's remark again ;)
Additional information Time of skin-generating varies from 1 to 20 sec. depending on your PC. It can be found at "Misk" in "Other" group, "Last Making Time" field. You can also change the program's interface, if you don't like it, in "Misk" -> "Interface" (try Lion King - it is cool - you know who's this remark is ;). Language also can be changed there. Also, if Russian or English is not your native languages, try to download others here. And if someone even can translate this program into different languages - you are always welcome at dimonius@dimonius.ru.
Conclusion Author does not take any responsibility for the possible errors and damage caused by this program. Suggestions and comments are welcome dimonius@dimonius.ru or
dimonius@kseniya.ru. Check for the newer version or other useful progs at http://www.dimonius.ru.
|
||||||||||||||||